
If you’re planning to visit the United States for tourism, business, study, or any other purpose, one of the crucial steps is completing the DS-160 form. This form is a mandatory online application used to process non-immigrant visas. Whether you’re applying for a tourist visa (B-2), a student visa (F-1), or a work visa (H-1B), the DS-160 is your gateway to securing your entry into the United States. In this comprehensive guide, we’ll walk you through everything you need to know about the DS-160 form, from what it is, how to fill it out, common mistakes to avoid, and tips for a smooth application process.
What is the DS-160 Form?
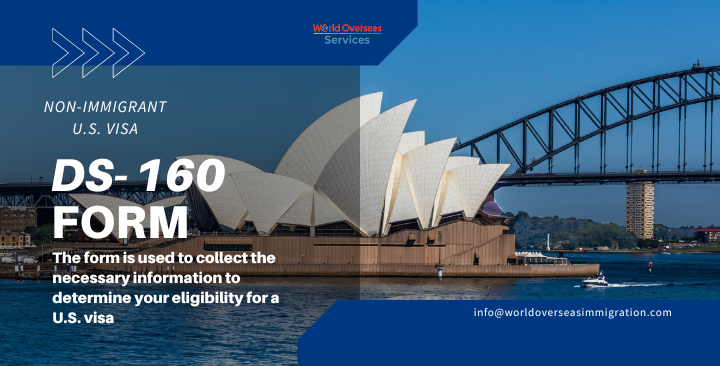
The DS-160 form, officially known as the Online Non-immigrant Visa Application, is a document required by the U.S. Department of State for all non-immigrant visa applicants. The form is used to collect the necessary information to determine your eligibility for a U.S. visa. It includes questions about your personal information, travel plans, background, and other relevant details.
Who Needs to Fill Out the DS-160?
Anyone applying for a non-immigrant visa to the U.S. needs to fill out the DS-160. This includes individuals applying for various visa categories, such as:
- B-1/B-2 Visa: For business and tourism purposes.
- F-1/M-1 Visa: For students and exchange visitors.
- H-1B/H-2B Visa: For temporary workers.
- J-1 Visa: For exchange visitors.
- L-1 Visa: For intracompany transferees.
- O-1 Visa: For individuals with extraordinary abilities.
- P Visa: For athletes, artists, and entertainers.
If you’re applying for a K (fiancé/fiancée) visa, you’ll need to fill out the DS-160 as part of the process.
Getting Started: What You Need Before Filling Out the DS-160
Before you start filling out the DS-160, gather all the necessary documents and information. This will help you complete the form accurately and efficiently. Here’s a checklist of what you’ll need:
- Passport Information: Your passport number, issuance date, and expiration date.
- Travel Itinerary: Details of your planned trip to the U.S., including your intended date of arrival and departure.
- U.S. Contact Information: Name, address, and phone number of your contact person or organization in the U.S.
- Previous U.S. Travel Information: If you’ve previously traveled to the U.S., you’ll need to provide details about your past visits.
- Educational and Employment History: Information about your educational background and employment history for the last five years.
- Digital Photograph: A recent photo that meets U.S. visa requirements.
Step-by-Step Guide to Filling Out the DS-160
Now that you have everything ready, let’s go through the process of filling out the DS-160 form step by step.
Step 1: Access the DS-160 Form
The DS-160 form is available online on the U.S. Department of State’s Consular Electronic Application Center (CEAC) website. You’ll need to select the location where you’ll be applying for your visa (usually the U.S. Embassy or Consulate in your home country).
Step 2: Start the Application
Once you’ve selected your location, click on “Start an Application.” You’ll be given a unique application ID number. Make sure to write down this number or save it somewhere safe, as you’ll need it to access your application later.
Step 3: Complete the Form Sections
The DS-160 form is divided into several sections, each covering different aspects of your application:
- Personal Information: You’ll be asked for your full name, date of birth, nationality, marital status, and other personal details.
- Passport Information: Enter your passport number, issuance date, and expiration date.
- Travel Information: Provide details about your intended travel dates, the purpose of your trip, and where you’ll be staying in the U.S.
- U.S. Contact Information: Include the name, address, and phone number of your U.S. contact person or organization.
- Family Information: You’ll need to provide information about your immediate family members, including your parents, spouse, and children (if applicable).
- Previous U.S. Travel: If you’ve been to the U.S. before, you’ll be asked to provide details of your previous visits.
- Security and Background Information: This section includes questions related to your medical history, criminal record, and other security-related issues.
- Education and Employment: Provide details about your educational background and employment history for the past five years.
- Additional Information: Depending on your visa type, you may be asked additional questions specific to your visa category.
Step 4: Upload Your Photograph
The DS-160 form requires you to upload a digital photograph that meets U.S. visa photo requirements. Make sure your photo is clear, with a white background, and adheres to the specified size and format. If your photo doesn’t meet the requirements, your application may be delayed or rejected.
Step 5: Review and Confirm Your Information
Before submitting your DS-160 form, review all the information you’ve entered to ensure accuracy. Any mistakes or discrepancies could lead to delays in processing your visa application or even denial of your visa. Once you’ve reviewed your application, confirm that all the information is correct.
Step 6: Submit the Form and Print the Confirmation Page
After you’ve reviewed and confirmed your information, submit your DS-160 form. You’ll receive a confirmation page with a barcode that you’ll need to print and bring to your visa interview. This confirmation page is crucial, as it’s required for scheduling your visa appointment and during your interview at the U.S. Embassy or Consulate.
Common Mistakes to Avoid When Filling Out the DS-160
Filling out the DS-160 form can be a daunting task, especially if you’re unfamiliar with the process. To help you avoid common pitfalls, here are some mistakes to watch out for:
- Incorrect Personal Information: Double-check all personal details, such as your name, date of birth, and passport number, to ensure accuracy.
- Inconsistent Travel Plans: Make sure the travel dates and details you provide match the information on your supporting documents.
- Incomplete Employment History: Provide a complete and accurate history of your employment for the past five years.
- Misleading Answers: Be honest and accurate in your responses to the security and background questions. Providing false information can lead to visa denial.
- Poor Quality Photograph: Ensure that your photo meets the U.S. visa requirements. A poor-quality photo can delay your application.
- Missing Confirmation Page: Don’t forget to print and save the confirmation page after submitting your DS-160 form. You’ll need it for your visa interview.
Tips for a Smooth DS-160 Application Process
To make the DS-160 application process as smooth as possible, consider these tips:
- Take Your Time: Filling out the DS-160 form is a detailed process, so take your time and don’t rush through it. Carefully read each question and provide accurate information.
- Save Your Progress: The DS-160 form allows you to save your progress and return to it later. Use this feature to avoid losing your work if you need to take a break.
- Use a Reliable Internet Connection: Since the DS-160 form is completed online, make sure you have a stable internet connection to avoid disruptions during the application process.
- Keep Copies of Your Application: After submitting your DS-160 form, print a copy of the completed form for your records. This can be helpful in case you need to refer to it later.
- Prepare for the Interview: Review the information you provided in the DS-160 form before your visa interview. The consular officer may ask you questions based on your application.
What Happens After Submitting the DS-160?
Once you’ve submitted your DS-160 form and printed the confirmation page, the next step is to schedule your visa interview at the U.S. Embassy or Consulate in your country. Here’s what to expect:
- Pay the Visa Application Fee: You’ll need to pay the non-refundable visa application fee, which varies depending on your visa type. Keep the receipt, as you’ll need it for your visa interview.
- Schedule Your Interview: Use the confirmation page to schedule your visa interview. The wait time for an interview can vary, so it’s a good idea to schedule it as soon as possible.
- Attend the Interview: On the day of your interview, bring your passport, the DS-160 confirmation page, the visa application fee receipt, and any other required documents. Be prepared to answer questions about your travel plans, background, and the purpose of your visit to the U.S.
- Wait for Your Visa Decision: After your interview, the consular officer will inform you of the decision on your visa application. If approved, your passport with the visa will be returned to you within a few days.
Frequently Asked Questions (FAQs) About the DS-160
Once the DS-160 form is submitted, you cannot make changes. If you realize you’ve made a mistake, you may need to fill out a new DS-160 form and bring both confirmation pages to your visa interview.
The time it takes to complete the DS-160 form varies depending on the individual. On average, it can take anywhere from 60 to 90 minutes to complete the form.
Yes, each applicant, including children, must submit their own DS-160 form.
Yes, someone else can assist you in filling out the DS-160 form, but you must be present and aware of the information provided. You will also need to electronically sign the form.
You can log back into the CEAC website using your application ID and retrieve the confirmation page to print it.
Conclusion
Filling out the DS-160 form is a critical step in obtaining a U.S. non-immigrant visa. While the process can seem overwhelming, taking your time, providing accurate information, and following the steps outlined in this guide can help ensure a smooth and successful application. Remember, the key to a successful DS-160 application is attention to detail and honesty. With the right preparation, you’ll be well on your way to securing your U.S. visa and embarking on your journey to the United States.